Watching Sweet Genius has me inspired to use some of my free time to expand my pastry & confectionery repertoire. I caught a few episodes last season, but Ron Ben-Israel (the host-judge-color commentator of the show) came across a little cold. When the new season started, I started watching and it's like he's come to life. The literal sparkle in his eye is accompanied by a childlike joy he expresses about his craft. His passion is clear, and it inspires the same in me. It also makes me smile and giggle a bit.
I've had some success in the past with chocolate and making homemade marshmallow, thanks to Chocolates and Confections at Home with The Culinary Institute of America
Both chocolate work and candy making are really all about controlling temperature, in order to control how the sugar reacts. Sometimes, you want crystals; sometimes you don't. My candy thermometer hints at just how precise a science it is - with temperature markings switching to terms like 'Thread' and 'Soft Ball' when it gets in the 230-270 range, and listing 'Caramel' where the 340 degree mark should be. Even a 2 degree difference can spell the difference between a chewy candy and a soupy mess, as I learned first-hand this weekend.
Dan mentioned off-hand that he was craving caramels. I was looking for an excuse to try something I hadn't done before, so that was all I needed to hear. I grabbed the book and flipped to the section covering brittles, toffees and taffys (as well as hard candies and caramels).
I didn't have all the ingredients the book called for in it's 'Soft Caramels' recipe, but I thought I could probably switch out a 14 oz can of sweetened condensed milk for a 14 oz can of coconut milk, and vanilla extract for a vanilla bean. Not exactly the same, surely, but I was eager to experiment.
Yesterday, with our friend Ruth coming over for some karaoke and take-out, I got to work on the caramels - combining all the ingredients in a saucepan and easing it up to 240 degrees F. It took longer than I anticipated because caramel tends to boil over, so I found myself eating lunch, chatting, and stirring hot sugary goodness. I think this made me over-eager to get it done. Despite an old-school test of the caramel in ice water showing it wasn't truly at soft ball stage, I poured the golden liquid into the awaiting buttered pan. 2 hours later, it was still essentially a liquid - a tasty, buttery liquid. We enjoyed a spoonful or two, but then left it.
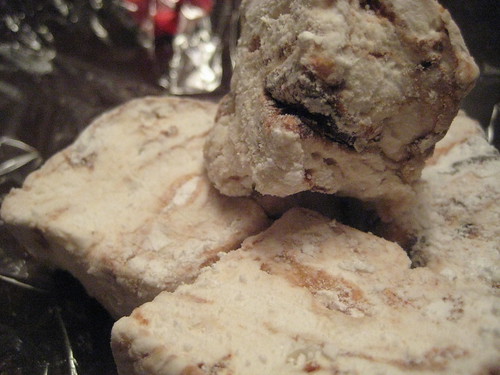
Today, I revisited the candy. I know that some sugar mistakes can't be corrected. Overcook caramel or get a little water in your chocolate, and they're not much good (though the latter could be chopped and put in cookies.) But I figured a mistake of under-cooking sugar might be fixable - especially given how much butter was in the mix. So I put the mixture back in the pot and brought it carefully up to 245 on my infrared thermometer, and doing the ice bath test again to be sure. This time, after 2 hours of resting I had soft, chewy caramels that hold their shape.
Oddly enough, the coconut flavor was completely gone. I was surprised, but happy at least that the chemistry all worked out.
Soft Caramels
4 oz (1/2 cup) water
1 lb (2 cups) granulated sugar
1 tspn vanilla extract
1 can (14 oz) full fat coconut milk
12 oz (1 cup) light corn syrup
6 oz (12 Tbpsn) unsalted butter, softened (cut into about 12 pieces)
1 tspn salt
Lightly butter a 9x13 baking pan. Combine the water, sugar, vanilla, coconut milk, corn syrup and butter in a heavy bottomed 4 quart saucepan. Bring to a boil, stirring constantly with a heat resistant rubber spatula. Continue stirring while cooking until the batch reaches 245 degrees F - beginning to test the caramel using the spoon technique (below) when it hits 240. The cooled piece on the spoon should be firm but not hard. Remove from the heat and stir in the salt. Pour into the prepared pan. Allow to cool completely at room temperature, about 2 hours. Remove the sheet of caramels from the pan by turning it out onto a cutting board. Cut into desired size pieces with a sharp chef's knife. Wrap in wax paper or cellophane (or dip in chocolate).
- Spoon Method for testing sugar temperature
Thread - will form a thread between your fingers
Soft Ball - will form a small, malleable ball when rolled
Firm Ball - will form a hard ball that cannot be flattened easily
Soft Crack - will form a flexible yet firm sheet
Hard Crack - will form a brittle sheet
Caramel - will be extremely brittle and exhibit the flavor, aroma, and brown color characteristic of caramel