Showing posts with label chocolate. Show all posts

Sunday, February 9, 2014

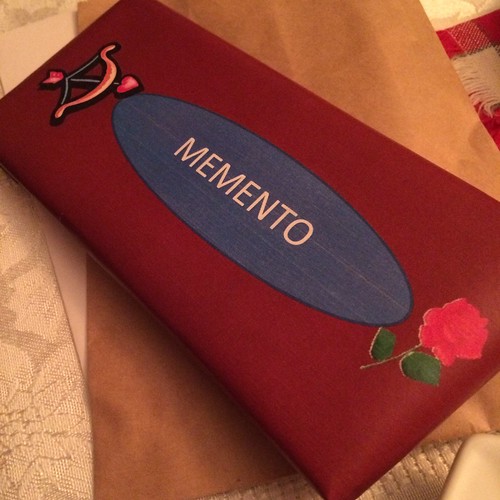
Memento: We Love Chocolate!


Last night was the penultimate round of our current season of Memento - the cooking club Dan and I belong to.  David & Carolyn hosted this round with a theme appropriate to February: Chocolate!  The theme was in part decided or at least inspired by their kids, Logan and Zoe, who have been asking for a chocolate themed memento for years.

They started us off with trio of chocolate.  First, flatbread with a subtle but delicious white chocolate baba ganoush.  Next, a gluten free crostini with dark chocolate and fleur de sel - the first really intense taste of chocolate that gave my napkin a workout.  And last but not least, roasted carrots with chocolate balsamic vinegar dipping sauce (that now necessitates a trip to Pike Place Market to procure our own bottle.  


Next up, Lizzie and John delivered an silky smooth white chocolate parsnip soup with homemade dill oil and cocoa dusted macadamia nuts.  It was so good it may have converted some parsnip haters to fans.  It was one of my favorite items of the night. 

In honor of our sugar/alcohol/meat free January, Dan made a strawberry banana smoothie from homemade almond milk, chocolate/stevia egg white powder, libido enhancing maca powder, and chia seeds.  All served in a dark and white chocolate rimmed glass.


I paired that with an arugula and red butter lettuce salad with clementine and red grapefruit, homemade cocoa butter goat cheese, cocoa nibs (for crunch) and a homemade strawberry/white balsalmic "shrub" (sipping vinegar) & sunflower oil dressing.


Flying solo tonight due to a family medical situation, James served a creamy Brie cheese, chocolate and pear panini featuring local ingredients.  It was served with a little mâche greens and some crispy basil chips with Hawaiian sea salt I made last year and gave to he and Marcy.  It was a perfect serving size and the chocolate and Brie tasted so wonderful together, their creaminess balancing with the crunch of the pear and bread.


The second entree was the first to include meat, and it was done wonderfully.  Beef short ribs and Portabello mushrooms in a chocolate rosemary and tomato sauce.  Melt in your mouth goodness.  They were paired with horseradish mashed potatoes and sautéed carrots.


Finishing out our decadent chocolate meal was a white chocolate sphere hiding chocolate mousse and heart shaped Chez panisse Ginger snaps shaped like hearts, with poached pears.  I loved the cookies with the mousse - and scored a few extras.


As our final courses were enjoyed, snow was accumulating outside, so we wrapped up quickly to get people home safely.  Looking back, I see pears, balsalmic vinegar and root veggies (carrots, parsnips and potatoes) showing up repeatedly, weaving both adjacent and disparate courses together, sharing that responsibility with the chocolate, of course.  It made for an excellent night of food and friends.  And anything that could travel (sorry - no smoothie) was packed and sent home for Marcy to enjoy.

http://www.thekitchn.com/how-to-make-almond-milk-at-home-cooking-lessons-from-the-kitchn-189996

http://drinks.seriouseats.com/2011/06/cocktail-101-how-to-make-shrub-syrups.html

Saturday, December 14, 2013

Memento: Southern


Tonight was Memento time again - our bi-monthly supper club potluck. This was the first time hosting the group for Linda & Nancy, at their beautiful home in West Seattle. Celebrating Linda's roots, the theme (revealed at the last Memento) was 'Southern', with two mandatory, classic Southern ingredients picked at random for each course.


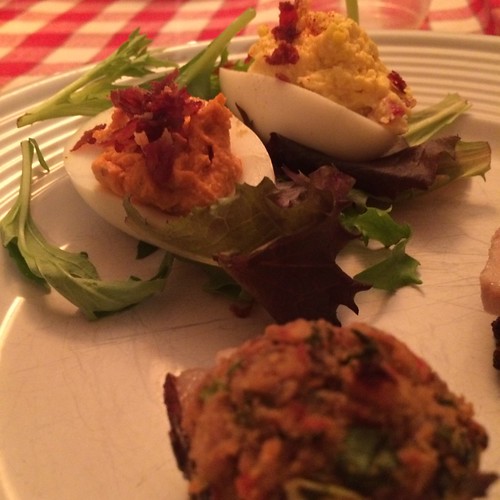
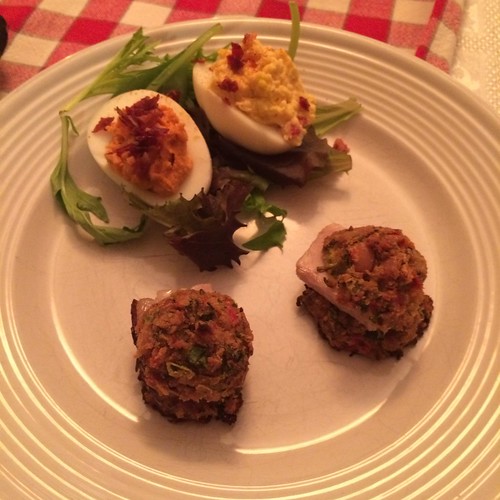
Linda & Nancy started us off with their plate, celebrating Black Eyed Peas & Cheddar Cheese. They did so in the form of two deviled eggs and two fritters. The first egg was a smokey pimento cheese deviled egg with chorizo, and the second was a Sriracha deviled egg with pancetta. Alongside them on the plate were two black eyed pea fritters (Johnny cakes?) with porcetta. And of course there was a big punch bowl full of delicious Southern Comfort punch that Linda whipped up soon after Dan & I arrived. Everyone agreed that Linda's deviled eggs were the best they'd had.


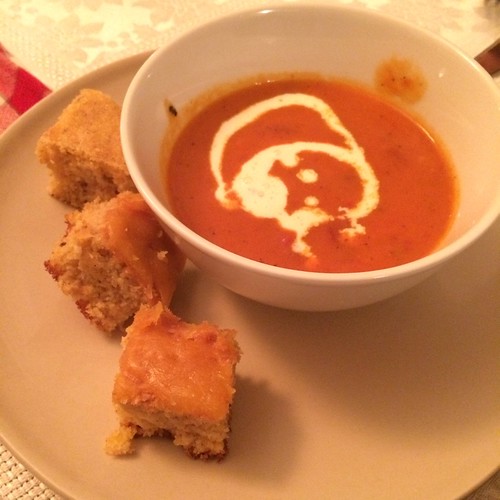
Next up, Carolyn & David payed homage to Tomatoes & Cornmeal. Their inspiration came from comfort food - specifically their son Logan's favorite: tomato soup and grilled cheese. A delicious tomato bisque soup with a beautiful swirl of cream shared the plate with three cornbread cubes, one with a decadent topping of melted cheddar cheese - which makes me want to top every batch of cornbread I make in the future with cheddar cheese.


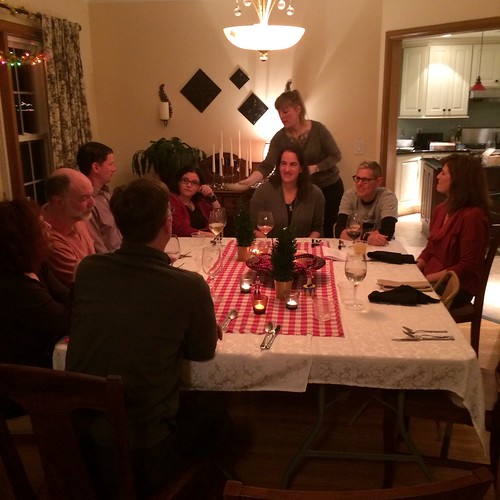
Another queue I'll be taking from this Memento is a square, rather than long rectangular table arrangement. It was wonderful to be able to talk with everyone around the table, and a peak under the tablecloth revealed it was simply two folding tables side-by-side. It also would increase tablespace for dishes for events like Thanksgiving.


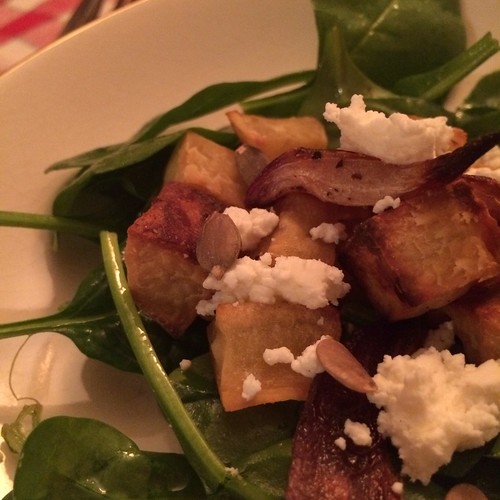
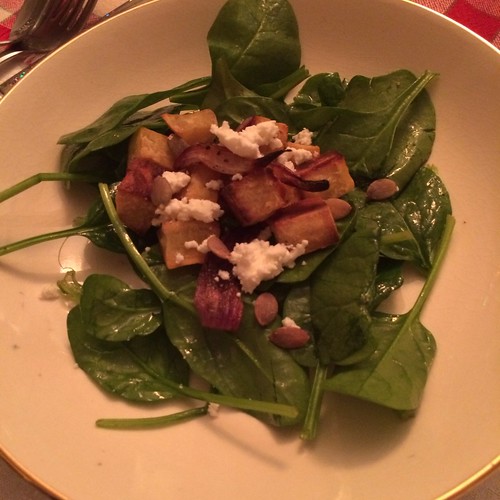
Our third course was created by Lizzie to feature the seasonal flavors of Sweet Potato & Pumpkin. First was a green salad with red onion and goat cheese, using roasted sweet potatoes as a perfect replacement for croutons, and a little crunch courtesy of pumpkin seeds.


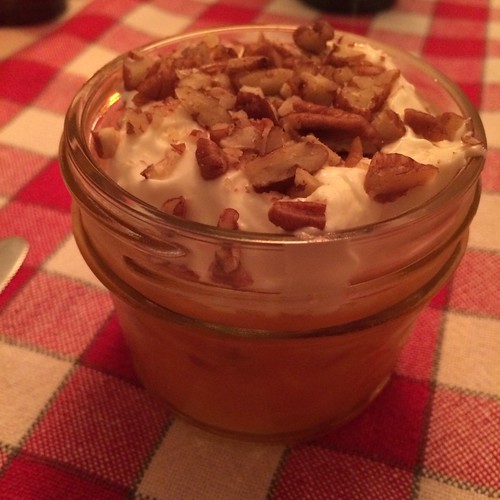
Alongside the green salad was a 4 oz mason jar filled with what's known in the South as a 'congealed' salad. Not the most appetizing name, but it's essentially a gelatin salad. This one was sweet potato, with a smoother texture courtesy of the sweet potato. It was topped with whipped cream and pecans. Despite the name, it turned out to be absolutely delicious, tasting like Thanksgiving.


Dan & I supplied the fourth course, inspired by Rice & Molasses. We stole a page from Marcy & James' playbook and merged Southern Italian food (specifically Sicily) with American Southern food, creating an Arancini di Riso.


Neither of us had heard of them before they became the dish du jour on the Halloween episode of Top Chef, and Dan quickly thought of using that as our rice component, then stuffing it with molasses baked beans.

Using Food Network's recipe as a jumping off point, we made and cooled a batch of simple risotto first, then combined it with parmesan and eggs and rolled it into balls. We pushed a little bit of red kidney beans (cooked with some vegetable stock and molasses) into the center and chilled them. Ultimately, they were rolled in breadcrumbs and deep fried at 350 degrees F until golden brown.

Dan made a peach sauce with Sriracha (a happy accident that this ingredient popped up again) to top the arancini, which was very good. Spicy and sweet.


I also made an agar-agar aspic of collard greens & shiitake mushrooms with vegetable stock spiked with liquid smoke and soy sauce to take the place of pork products so commonly cooked with collards. I warmed it to 140 degrees F still in the silicon molds, submerged in our Sous Vide Supreme. Unlike gelatin, which melts when reheated, agar-agar never unsets. I unfortunately didn't get the collards completely encased, so my cubes fell apart a little, but I think still tasted good.

Dan also revived his cocktail from last year's Oscar's - a combination of ginger ale, bourbon, peach nectar, and campari.


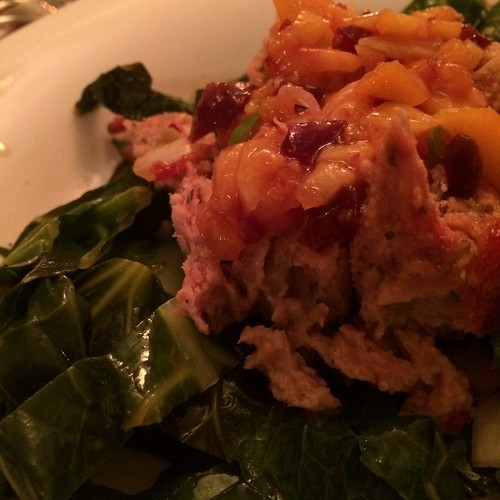
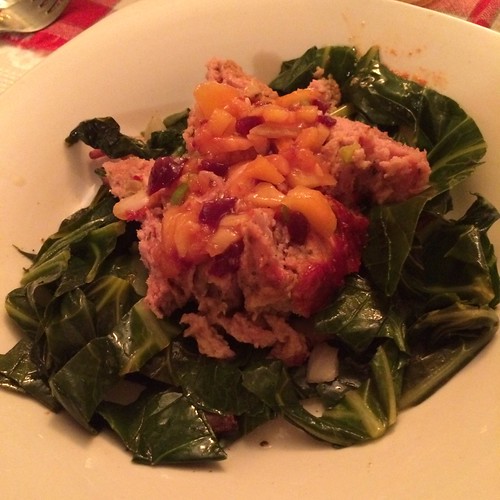
Highlighting Peaches & Greens, Marcy & James served the penultimate course. An epic pork meatloaf topped with yummy peach chutney. It rested on a bed of collard greens. Although we repeated collards in our course (planned based on theirs), the two shared little in common. Where ours were cooked down, Marcy & James still had a crispness to them, and they didn't shy away from cooking them in some bacon.


Rounding things out, Anna & Jason put a Seattle-meets-the-South take on Buttermilk & Brown Sugar.


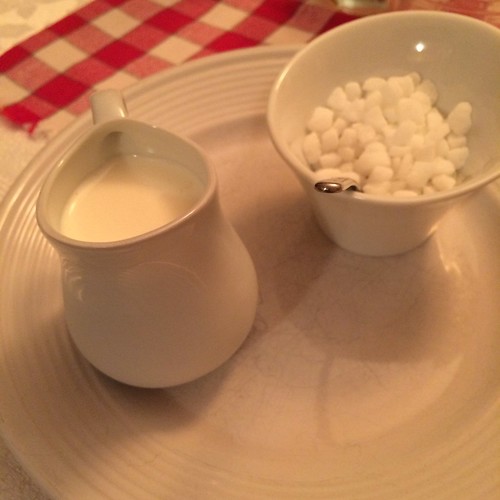
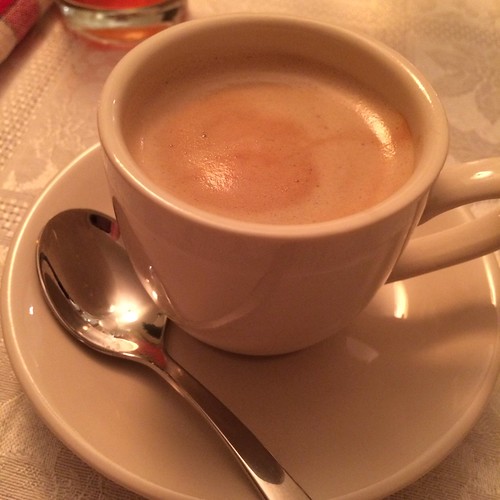
First came out cream and sugar, then cappuccino cups of Americano coffee. Although the South is more about tea than coffee (as Anna pointed out), going with an Americano seemed appropriately Southern, it it's own way. And Linda & Nancy had sweet tea on hand, of course.


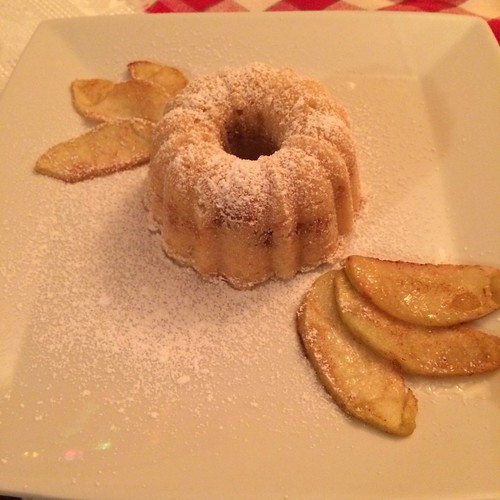
Finally, they revealed mini bundt cakes of buttermilk pound cake filled with a cinnamon struesel - their wonderful Southern take on coffee cake - paired with roasted granny smith apples. The cake was designed to share, so everyone shuffled to sit next to their spouse, which proved very good timing.


Carolyn & David passed out the invitations to our next event, which they'll be hosting.


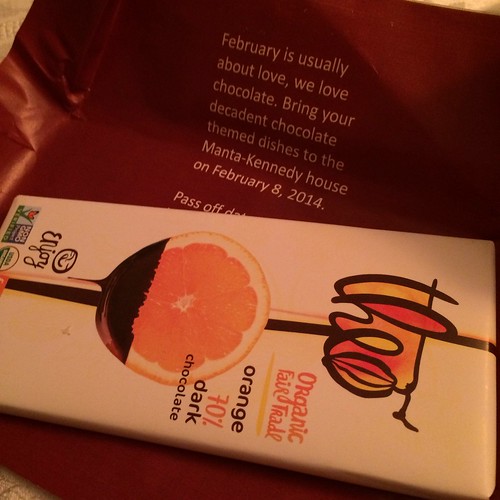
The invite for our February get-together, arrived in suitably Willy Wonka fashion, a la the golden ticket. The theme will simply be 'Chocolate' - which their kids ask for each time they're hosting. Dan & I should have a challenge, given we have the traditionally salad course.


The night also ended with a surprise gift for David, several months in the making. David loves skulls, doesn't drink, but adores those Crystal Skull vodka bottles. He has a small one, but Anna & Jason bought a big bottle and were gracious enough to drink it. They passed the bottle to me on Halloween, to let me get creative with it. I filled it with water and Glycerin(to make the water more viscous) and a few colors of Martha Stewart Glitterthen put it on a Multi-Color LED Light Base.


Sunday, May 12, 2013

Mother's Day Cake

Mothers Day Cake

Back in February, I shared a culinary goal I set for myself this year: to make a multi-tiered cake. After years of watching cake competitions and cake reality shows, and after growing up watching my mom bake and decorate beautiful cakes, it was time I dive in and give it a try.

As with many goals I've set for myself in the past, I spent the past few months without getting past the first step - buying the stuff. I can't tell you how many projects I've purchased the gear for, but never seen them through. But this week, I changed that - at least for this goal.

Our Mother's Day celebration w/ Dan's family got shifted to Saturday, and I was asked to make dessert - but not given any specific request. I took that as my opportunity to push myself and accomplish this goal. I had all the gear I needed, so I stocked up on flour, sugars, cocoa, egg whites and vanilla extract, and started doing my research.

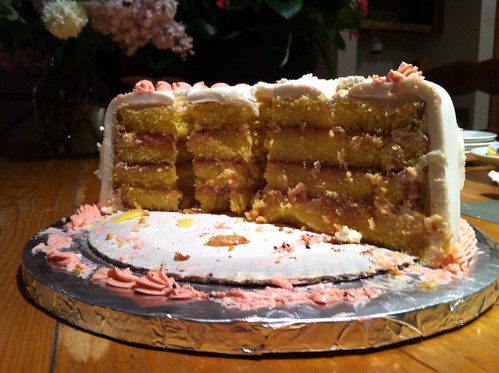
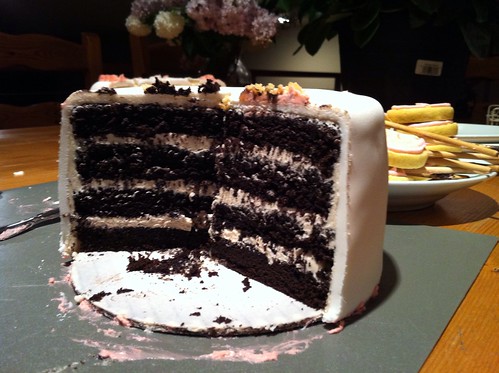
Given the number of guests, I found that two tiers would be more than enough, and would allow me to do a different flavor in each. Although the recipes and techniques I used were all from Confetti Cakes For Kids, I found the Wilton.com site incredibly useful in figuring out how much batter to make for each of the four pans I was using (2 six inch, 2 eight inch). Using their guidance, and the ingredients lists for two recipes from the book (one chocolate, one yellow), I estimated I needed one full batch of yellow cake batter, and a half-batch of chocolate. Everything went just fine with the cake making, and while they cooled I made a vanilla buttercream recipe - the kind with egg whites that requires heating. I also made a rhubarb & sugar jam that would become the filling for the yellow cake. So far so good.


Next I got to put my new revolving cake stand, using it to help trim the tops off and cut each of the 4 cake in half, creating four layers for the bottom cake, and four for the top. Using a piping bag, I created a dam of frosting all around each layer of the yellow cake, filling in ('torting') with the rhubarb jam, then adding the next layer. Once the top layer of yellow cake was on, I did a crumb coat (a thin layer of frosting over the entire thing, then wrapped it in cling wrap and put it in the fridge. I repeated those steps with the chocolate layers, but filling them with more frosting rather than jam. There was enough trimmed from the chocolate cake that I got to taste it with a little frosting, and it reminded me of an Oreo cookie.

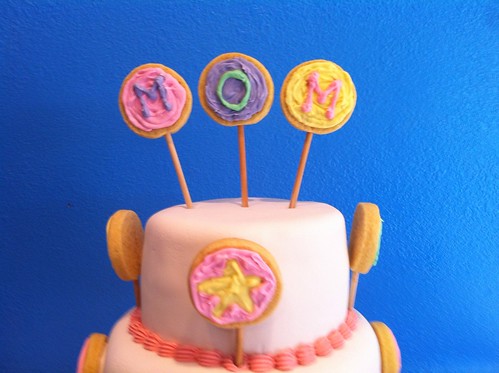
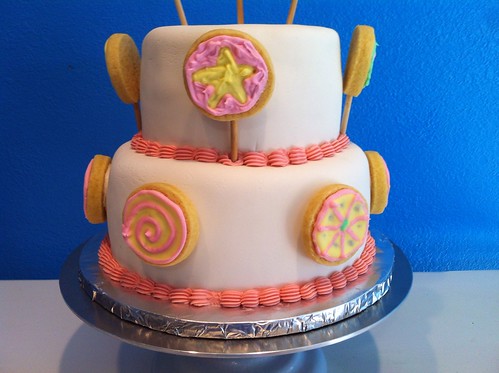
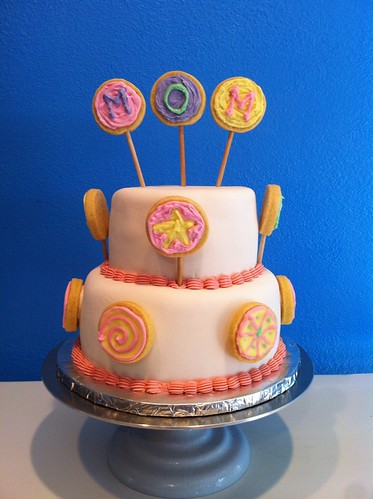
I also made a batch of sugar cookie dough using a recipe from the book, and after resting in the fridge overnight, baked little circles - some with wooden lollipop sticks in them. Using royal icing (yet another recipe from the book), I decorated them. My intent was to use flooding techniques and get smooth, pastel colored icing on each cookie - but I failed to re-read the section on flooding and didn't realize I needed to water down the icing to use it in that way. I figured this out after most of the cookie pops and cookies were done, but did get to try a little of it. Next time they'll turn out much better. I did three pops that spelled out M-O-M and four more with hearts and stars - all in pastel yellow, pink, green and purple.


The morning of, I pulled the cakes out of the fridge, did a little trimming and adjusting with frosting, and inserted dowels in the bottom tier (to support the top tier). My first dowel (actually hollow plastic tubes) was cut a little long, so I had to pull it back out. This turned out to be a blessing in disguise, as it gave me a core sample from the rhubarb-filled yellow cake, confirming that even after a few days in the fridge, it stayed moist and delicious.

Support structure in place, I got to kneading the fondant. I used store-bought fondant, and it was very easy to work with. To keep things simple, I didn't try tinting it. I wasn't sure how much I'd need for each layer, so thought it best to keep it all white while learning. This proved a good plan, as I ended up with much more fondant than necessary when I covered the top tier. Everything went pretty smoothly with both tiers, and the 1/4 inch thick fondant (the advice in the book) covered a multitude of bumps and lumps in my cakes, and the results were two smooth, white tiers.


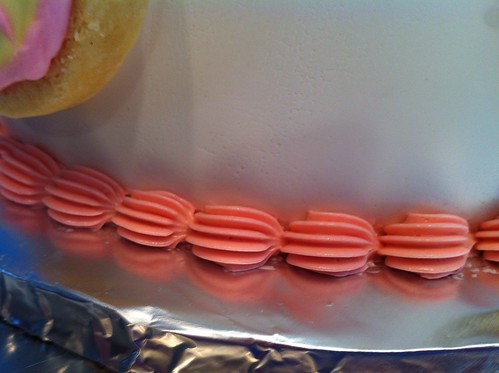
A few dabs of royal icing secured the top tier to the bottom, and allowed me to attach the cookies around the bottom layer. I also put the pops in the tops of both layers, with "MOM" on top. Last but not least, I added pink food coloring to the leftover frosting, and piped a border around the base of each layer, to cover the seams.


I made some mistakes along the way, and learned a lot, but in the end, the cake turned out great. It was something I could be proud of, and was enjoyed by everyone. Our nephews both took pictures, and Blake posted one in Instagram... accruing a 'like' in less than 1 minute.


Some of my other goals for the year are not culinary, but this has inspired me to push myself more in and out of the kitchen. I strongly recommend Elisa Strauss' books if you're interested in learning to make this type of cake.

Friday, March 9, 2012

Peanut Butter Cupcakes w/ Chocolate Ganache Frosting


Tonight we celebrate the birthdays of my nephew Milo and my sister-in-law, Midge. My mother-in-law asked for the classic chocolate cupcake with vanilla buttercream, but my wonderful husband knew I'd been obsessing over a peanut butter cupcake recipe I found online, and asked his sister if Milo likes chocolate & peanut butter, and she gave the thumbs up.

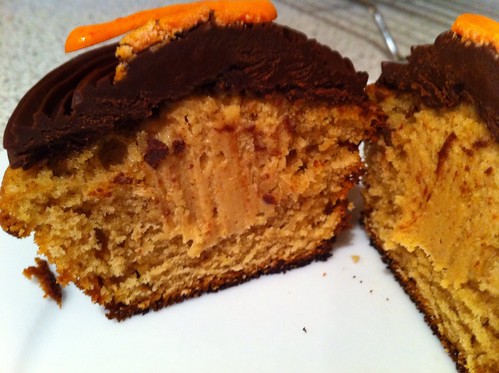
Intellectually, I feel like cupcakes are a bit overexposed, but I also recognize there's a reason they're so popular. Self-contained, infinitely adaptable, and simultaneously elegant and a comfort food, it's unlikely any other dessert will surpass them in popularity. I finally came to terms with this love-hate relationship with cupcakes and started TiVo'ing Food Network's Cupcake Wars (which I'd been watching whenever I found it on anyway). One thing I noticed was that the contestants who succeeded on the show always went beyond simple cake and frosting, adding fillings, drizzles, and edible decorations on top. That inspiration led me to this Peanut Butter cupcake with Peanut Butter filling, chocolate ganache and a white chocolate monogram on top.

Peanut Butter Cupcakes
2 cups brown sugar
1/2 cup shortening
1 cup peanut butter
2 eggs
1 1/2 cups milk
1 teaspoon vanilla extract
2 1/2 cups all-purpose flour
1 teaspoon baking soda
2 teaspoons cream of tartar
1 pinch salt

Preheat the oven to 350 degrees F (175 degrees C). Line two cupcake pans (24 cupcakes) with paper liners. In a medium mixing bowl, combine the flour, cream of tartar, baking soda and salt, and whisk together to evenly distribute all ingredients. In your stand mixer, mix together the brown sugar, shortening and peanut butter until light and fluffy. Beat in the eggs one at a time, then stir in the vanilla. With mixer on low speed, add the flour mixture to the batter alternately with the milk (a little flour, a little milk, a little flour, a little milk, etc.). Spoon into the prepared muffin cups. Bake for 15 to 20 minutes, until the top of the cupcakes spring back when lightly pressed. Cool in the pan for at least 10 minutes before removing to a wire rack to cool completely.

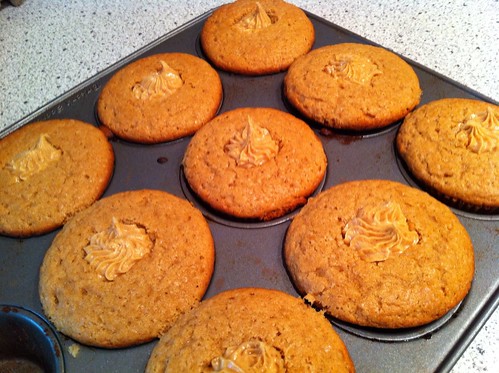
Once cooled, use a small pair of tongs to pull a small chunk of the cupcake from the center, making space for the filling.

(From AllRecipes.com)


Peanut Butter Filling
1 cup creamy peanut butter
3 Tbspn unsalted butter
2/3 cup confectioners' sugar

In a medium bowl, beat the peanut butter with the butter until creamy. Sift the confectioners' sugar into the bowl and beat until light and fluffy, about 2 minutes. Spoon the peanut butter filling into a pastry bag fitted with a large tip. Gently squeeze the pastry bag to fill each cupcake.

(From Food & Wine Magazine)


Chocolate Ganache Frosting
16 oz bittersweet chocolate
16 oz heavy cream

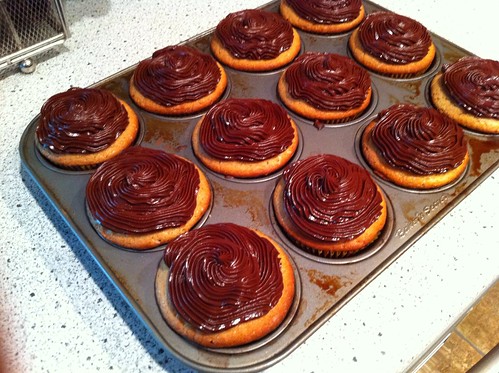
Put chocolate in a medium mixing bowl and set on a trivet. Place cream in a heavy saucepan over high heat and bring to a boil, then pour over chocolate. Allow to sit 5 minutes, then whisk until fully combined. Place bowl on an ice pack to speed cooling, and allow to cool for several hours, until thickened to a frosting consistency.

Spoon ganache into a pastry bag fitted with a star tip and pipe onto cupcakes.


White Chocolate Letters
3 oz white chocolate
Gel food coloring

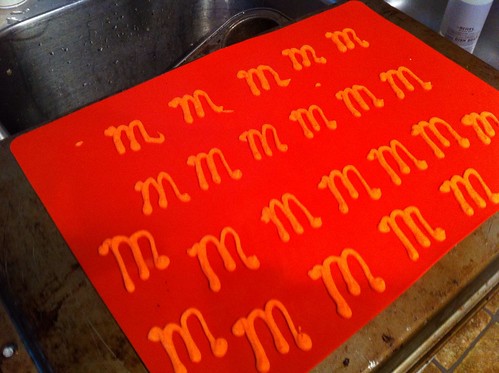
Chop white chocolate finely and place in a small glass bowl. Add several drops of gel food coloring. Place bowl in the microwave and heat on high for 20 seconds, then 10 more seconds at a time until you are able to stir together. The chocolate will be melted before it appears melted, so check with a spoon before heating further. Stir until fully combined. Spoon into a small pastry bag with a very fine tip. Pipe letters onto a smooth silicone baking mat placed on an overturned baking sheet. Chill in the refrigerator. When firm, carefully peel from mat and place on cupcakes.


The cupcakes were well received, with my brother-in-law going for a second and my mother in law saying they looked professional - both high praise. I did, unfortunately, overcook some of the cupcakes, with some being a little burned on the bottom. When I checked them at 20 minutes, they seemed very soft on top, so I gave them 3 extra minutes - which was too much for some of them. I also failed to taste the filling before piping it into the cupcakes, and it wasn't as transformed as I'd hoped. I would definitely make these again, but would fill the cupcakes a little less, and cut back on the peanut butter and increase the sugar and butter in the filling to make it smoother and sweeter.

Sunday, March 4, 2012

3-Layer S'mores Tart - Second Attempt


Today was my first day in my new role. I jumped at the chance to work with my old boss, John, despite having to leave a great team.

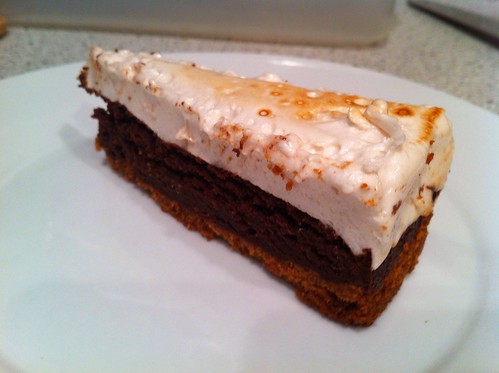
During the interview process, it came up that one of my new coworkers is not only from Hawai`i, a food blogger and an amateur pastry chef, but she also LOVES s'mores. (We later discovered we both had Pinterest boards dedicated to them.) So to give my new coworkers an excuse to stop by and introduce themselves, I decided to make a S'mores Tart I've been thinking about for awhile.

This is the second iteration of this recipe, and won't be the last. The first went undocumented, but differed only in that the marshmallow layer was added prior to baking in the form of chopped up homemade marshmallows. It was a way to use up leftover marshmallows after the last Memento dinner party. Even while making it, I was imagining pouring the liquid marshmallow on top so it could set as a distinct layer... so that's what I did.

3-Layer S'mores Tart

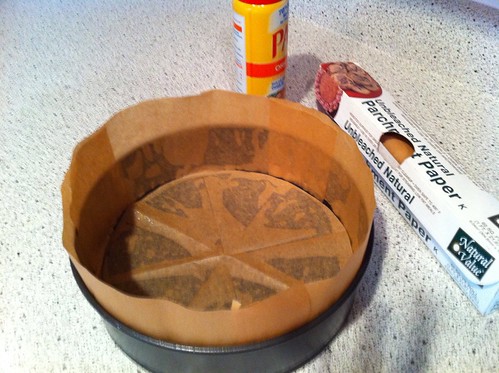
Gather a 9" springform pan, parchment paper, scissors, and cooking spray. Cut three strips of parchment a little taller than the springform pan, and cut a circle of parchment that fits the bottom with little or no gaps.
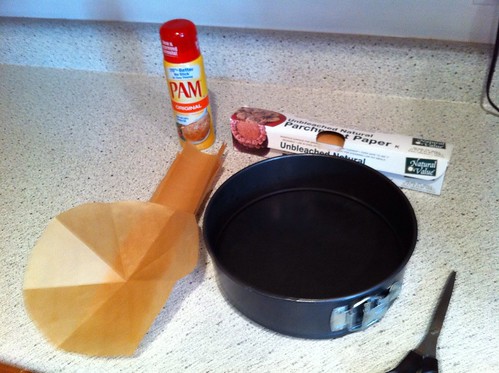


Spray the bottom and sides of the pan w/ cooking spray and line with the parchment paper.


Layer One: Graham Cracker Crust
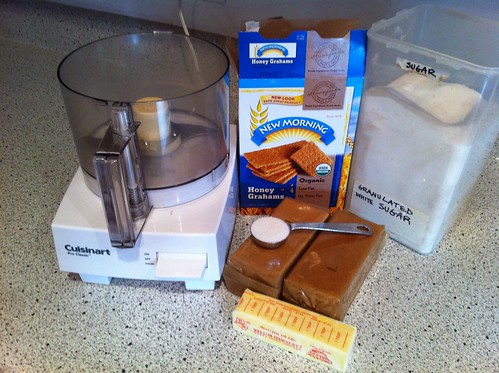
Gather a food processor, 1/4 cup of unsalted butter, a glass liquid measuring cup (or similar container), 20 graham crackers and 2 tablespoons of sugar. Every time I buy graham crackers, they come in large rectangles that are made up of two squares, each consisting of two small rectangles (aka, 4 small rectangles per large rectangle) For the purposes of this, and other recipes, 1 cracker = 1 square, or 1/2 of a full rectangle. That always confused me.


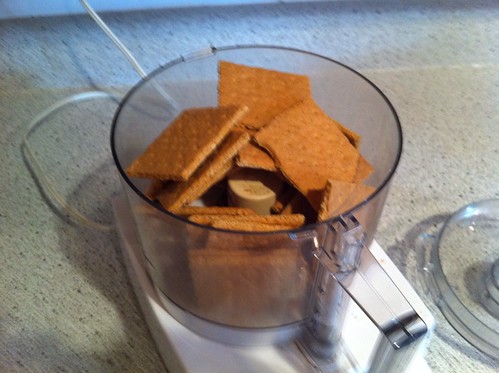
Put the graham crackers in the food processor - break them up to fit them all.


Turn the processor on and run until you have all uniform crumbs. If you have a few larger pieces, pulse it a few times then let it run for awhile more. There's no risk of over-processing - but having a big chunk could throw off the crust, so err on the side of running it longer.
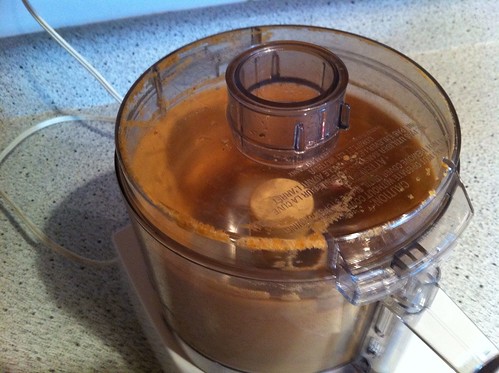


The crumbs should look uniform in size, like delicious dry sand.
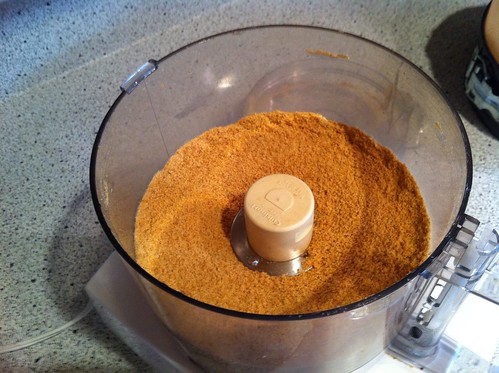


While the crumbs are processing, put the butter in the measuring cup and microwave on high for 30 seconds, then 20, then 10. That should be enough to liquify it. If you need more time, microwave on high for 10 seconds at a time until it's liquid. Don't be tempted to set the timer for 60 seconds! Microwaves heat butter from the inside out, and as the inside of the butter melts, it produces steam. If it doesn't have time to rest, that steam will cause the stick of butter to explode.

With the processor on, pour in the melted butter.
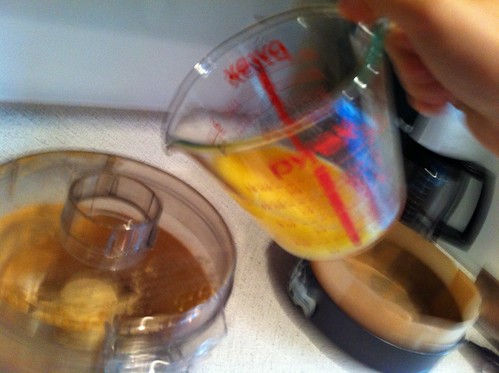


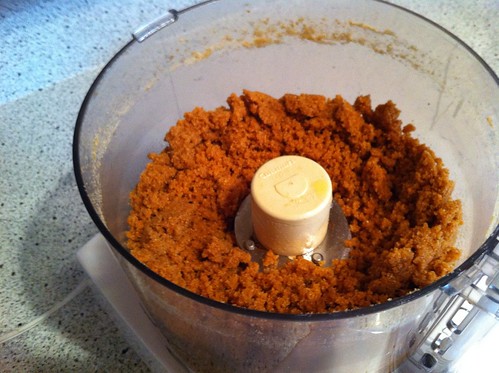
Continue to process until the mixture takes on the appearance of wet sand - consistently moistened by the butter and clumping together a bit.


Dump the crumb mixture into the pan and spread to create an evenly thick layer on the entire bottom of the pan.
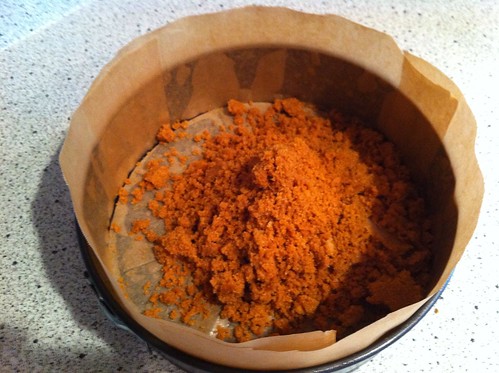


Using a smooth bottomed glass, pack the mixture down.
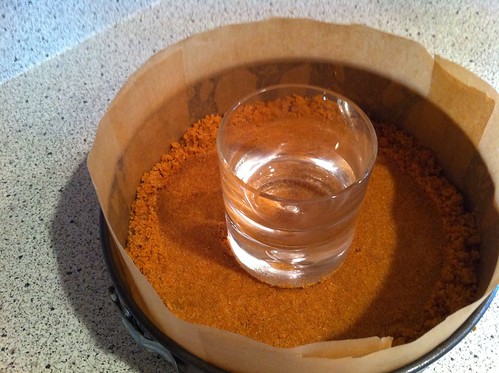


Bake for 8 minutes at 350 degrees F, then allow to cool.
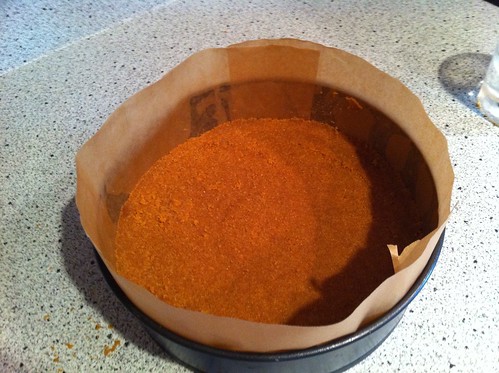


Layer Two: Chocolate Brownie
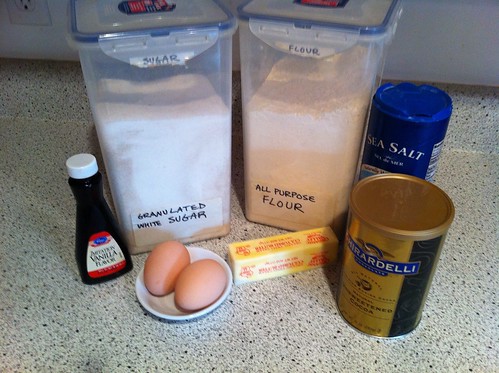
Gather one medium and one small mixing bowls, your glass liquid measuring cup, 1 stick of unsalted butter, 1/2 cup all purpose flour, 1/2 cup unsweetened cocoa powder, 1 cup of granulated sugar, 1 teaspoon of salt, 2 eggs, and 1 teaspoon vanilla extract.


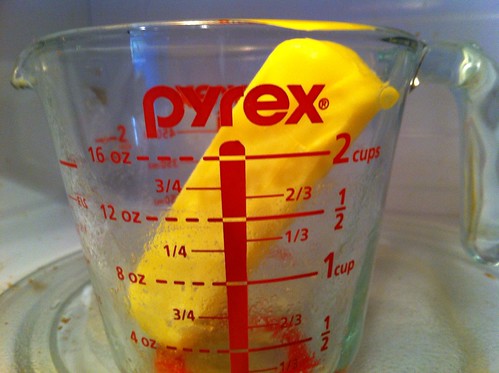
Melt the butter in the measuring cup, as before.


Put all the dry ingredients (flour, cocoa powder, sugar and salt) in a medium mixing bowl.
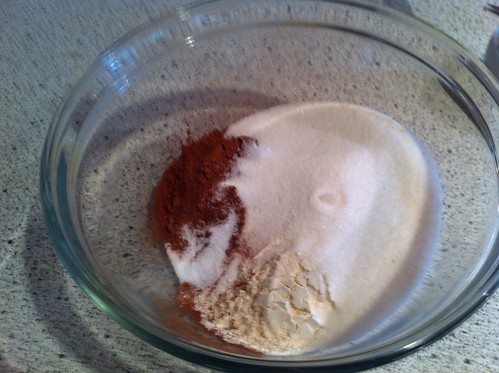


Using a whisk, mix the dry ingredients until uniformly combined.


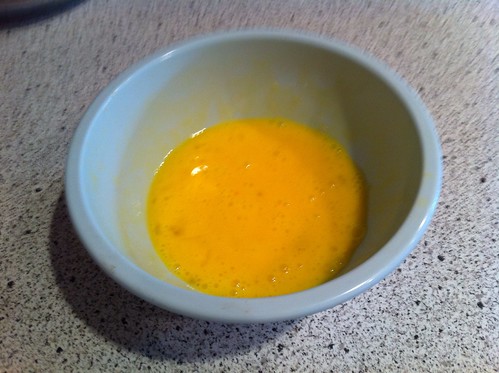
Using the same whisk, beat the eggs in the small mixing bowl.


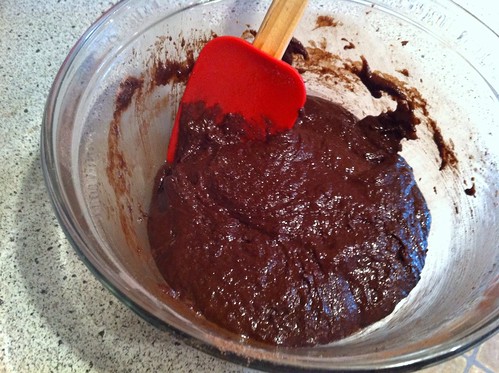
Add the melted butter, and vanilla to the dry ingredients and stir a couple times, then add the eggs and stir just until the mixture looks all the same color. Avoid mixing it more than necessary to get that uniform look to the batter. It will be a fairly thick batter - thicker than cake batter.


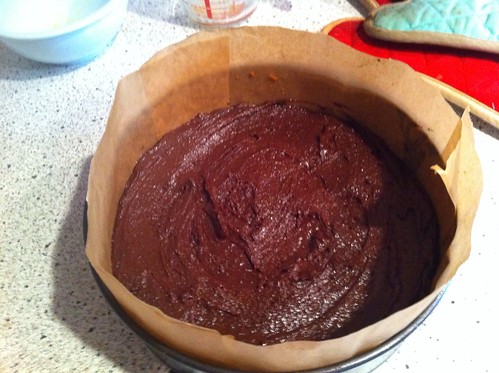
Pour the batter on top of crust and spread into even layer with a spatula. Bake at 350 degrees F for 30 minutes, then set aside to cool.


Layer Three: Marshmallow
Gather your stand mixer, a medium saucepan, a candy thermometer, 1 cup of cold water, 3 Tbpsn (~4 packets of Knox) Unflavored Gelatine, 2 cups of granulated sugar, 3/4 cup light corn syrup, 1/4 teaspoon of salt and 2 tablespoons of vanilla.


Put 1/2 cup cold water in the bowl of your mixer and sprinkle all the gelatine on top.
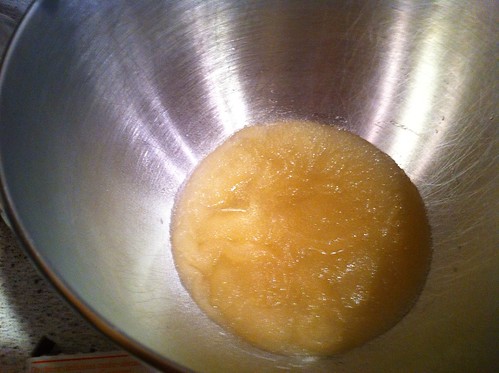


Allow to sit for 45-60 minutes so the gelatine can bloom.
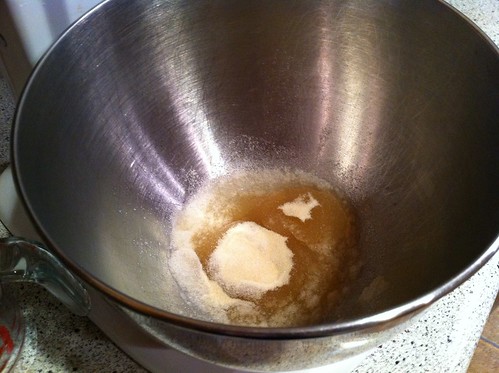

Put 1/2 cup water, the sugar and the corn syrup in the saucepan on the stove on high heat.
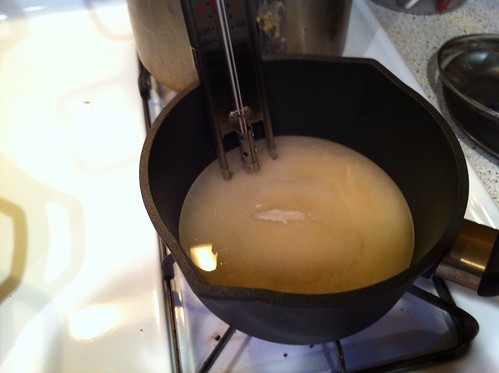


Without stirring, bring the sugar mixture to a boil.
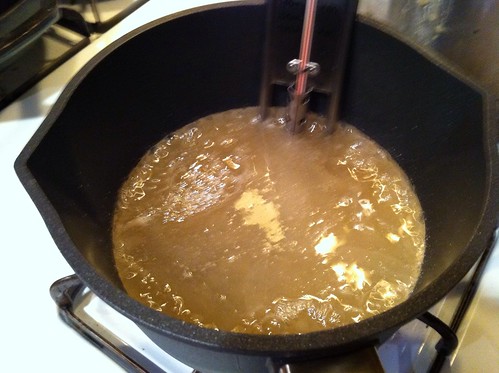


Keep cooking until it reaches 240 degrees - the 'Soft Ball' stage. Remove it from the heat before it hits 244 degrees, as the sugar will move into the 'Firm Ball' stage, which won't produce marshmallow (but will give you a nice caramel).
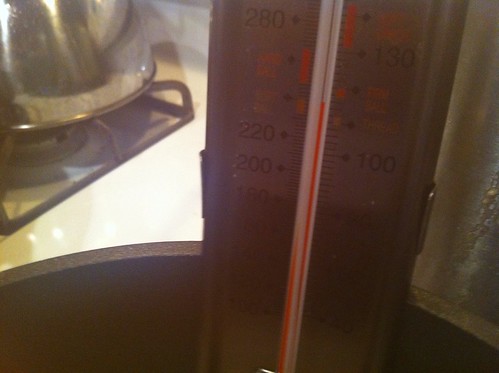


Remove the sugar mixture from the heat and (with the mixer on low), pour it all into the mixer.
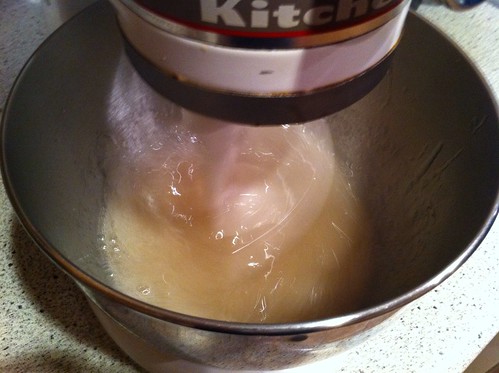


Increase the speed of the mixer to high and continue mixing until it doubles in size and becomes shiny and white. This will take about 15 minutes.

Pour the marshmallow goo into the springform pan on top of the cooled brownie layer and leave it out on the counter overnight to set up.

Open the springform pan to remove the tart, then pull off the parchment. The graham cracker crust should be firm enough that you can slide it off the pan bottom and pull off the parchment circle - but treat it gently.

Using either a butane/propane torch, or the broiler of your oven, toast the marshmallow layer to give it that signature golden brown look and toasted taste.
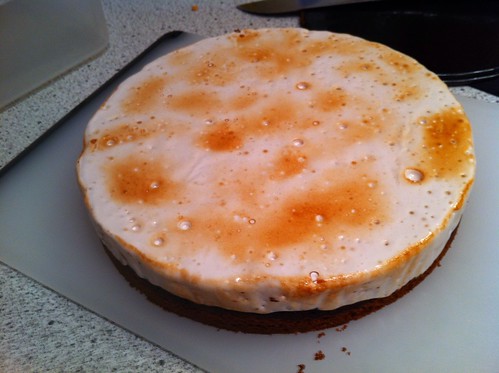


Cut and serve!


These were a bit hit with folks at work. One person came back for 3rds, which I took as a very good sign. But there were a few logistical issues I'd like to work on solving in my next iteration (and there will definitely be more iterations).

1. The marshmallow layer pulls away from brownie layer, particularly on day two. Perhaps melted chocolate or even a ganache in between the layers would help bind them?

2. The marshmallow is very sticky, making it difficult to cut and causing the pieces to stick back together even after cut. Perhaps I could make individual tarts in a muffin pan using aluminum baking cups or simply a silicon muffin pan. Portioning out the three layers would be more difficult, but serving and eating would be simpler.

3. I used less than half the marshmallow mixture (using the rest to make coconut covered marshmallows. I could try cutting back on the volumes by about 1/2, but this risks the volume being so small it won't function properly during the sugar boiling and mixing stages.

As it turns out, it was a good week to be experimenting with S'mores on our street. Just down the block, our neighbor Twice Cooked Half Baked was making a deconstructed s'more treat with her kids!

(Graham Cracker Crust recipe from BakeWise: The Hows and Whys of Successful Baking with Over 200 Magnificent Recipes by Shirley O. Corriher. Brownie recipe from Cheap & Easy: A Cookbook for Girls on the Go.)